Disk Recon 14.1
Working with Disk Recon
The picture below shows you what a typical Disk Recon screen looks like.
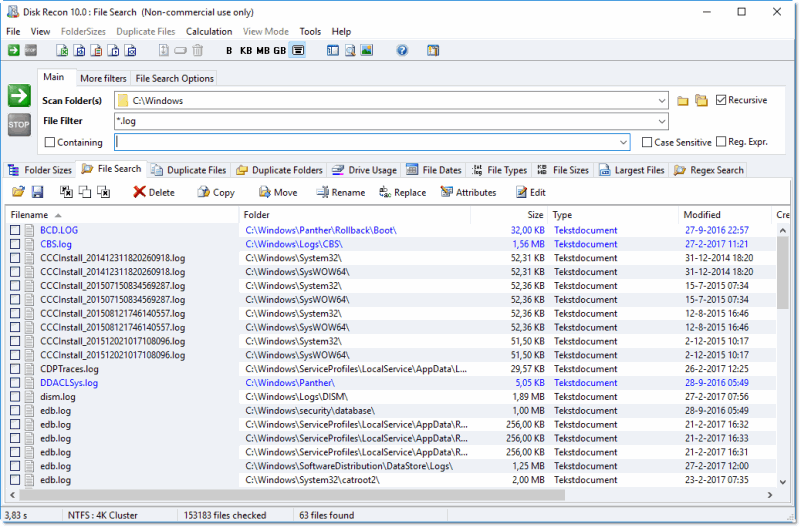
Main Areas of the Screen
The Disk Recon window is divided into four main areas:
- Control Panel (top left) — Set up your query here. Choose the folder(s) to scan, apply file type filters, set date and size ranges, and press the green Start button to begin. See Control Panel for a full description.
- Folder Tree (bottom left) — Shows a live tree of scanned folders. Click any folder to instantly see its files in the result panel. Toggle visibility with Ctrl-T.
- Result Tabs (top) — Switch between query modes: Folder Sizes, File Search, Duplicate Files, Duplicate Folders, Disk Usage, File Types, File Sizes, File Dates, Largest Files, File Monitor, and Regex Search.
- Result Panel (main area) — Displays results of the active query. Click any column header to sort. Right-click any item for actions such as open, delete, explore containing folder, or copy filename to clipboard.
Typical Workflow
- Select a start folder or drive in the Control Panel.
- Optionally set a file filter (e.g.
*.mp4;*.avi) or date/size constraints. - Choose the result tab you want (e.g. Folder Sizes or Duplicate Files).
- Press the green Start button. Results appear in real time as Disk Recon scans.
- Use the result grid to sort, filter, preview, and act on files.
Copyright © 1998-2026 Blacksun Software. All Rights Reserved