X-Fonter 14.0
Character Map Printout
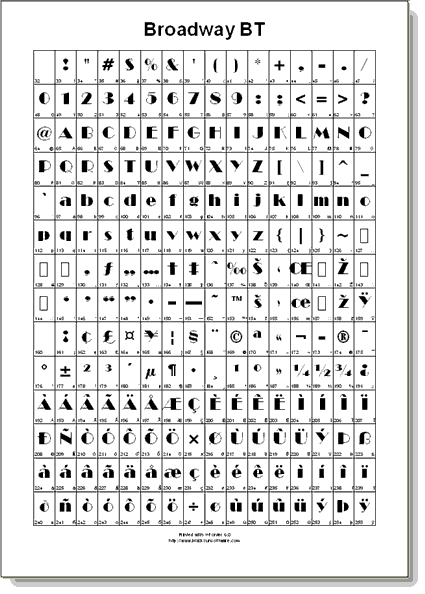
The Character Map report prints a grid of every character in a selected range — either the full 256-character ASCII/ANSI set or a chosen Unicode block — rendered in the font being printed. Each cell shows the glyph alongside its decimal code point, making it easy to look up values and confirm coverage at a glance without a computer in hand.
What the Report Contains
Each page of a Character Map printout shows:
- Font name — printed at the top of the page so multi-font print jobs remain clearly labelled
- Character range — the Unicode block name or ASCII range covered on that page
- Character grid — every character in the range laid out in rows, each cell showing the glyph rendered in the font and its decimal code point below it
- Unsupported characters — cells where the font has no glyph appear empty or show a fallback box, making gaps in coverage immediately visible
When printing multiple fonts, each font gets its own page or set of pages. The report for each font covers the same character range, which makes side-by-side comparison of coverage straightforward when you fan out the pages.
ASCII vs. Unicode Maps
In the print dialog you can choose between an ASCII map and a Unicode map:
- The ASCII map covers all 256 characters in the ANSI range (code points 0–255) and fits comfortably on one or two pages depending on cell size. It is the right choice when you need a complete single-page character reference for a font used in standard Western European text.
- The Unicode map lets you choose a specific Unicode block — Basic Latin, Latin Extended, Greek, Cyrillic, Arabic, Mathematical Operators, and many others — or enter a custom code point range. This is the right choice when you need to verify a font's coverage for a specific script or symbol set beyond the ASCII range.
Practical Uses
The Character Map printout is most useful when you need a portable, offline character reference. Common scenarios include:
- Confirming language coverage before committing to a font for a multilingual project — print the relevant Unicode block and mark any missing characters
- Providing a font reference to a typesetter or proofreader who does not have the font installed — the printed grid shows them exactly which characters are available and what their code points are
- Archiving font coverage documentation alongside a delivered project, so the character set used is on record even if the font files are later moved or updated
- Checking symbol fonts and dingbat fonts — these often have no standard alphabetical characters, so the character map is the only practical way to see what glyphs the font actually contains
Producing This Report
Select Character Map as the report type in the print dialog, then choose your ASCII or Unicode range. For full configuration instructions see Printing Fonts. To check the grid layout before printing, use Print Preview — zooming to 100% is recommended to verify that cell sizes are legible before sending a large job to print.
Related Topics
- Printing Fonts — configuring the print dialog and choosing the character range
- Print Preview — checking the grid layout before printing
- Font Overview Printout — the other report type, showing each font's sample text rather than its character grid
- Unicode Character Map — the on-screen equivalent for checking character coverage interactively
- ASCII Character Map — the on-screen equivalent for the ANSI character range
Copyright © 2001-2026 Blacksun Software. All Rights Reserved