X-Fonter 14.0
Browse & Find Fonts
The Browse tab lets you locate and preview fonts that are not yet installed on your system. You can point X-Fonter at any folder — on a local hard drive, a USB stick, a CD/DVD, or a network share — and it will scan for all TrueType (.ttf), OpenType (.otf) and PostScript Type 1 (.pfb/.pfm) font files and display them ready to preview.
Because fonts are only read during browsing, nothing is changed on your system until you explicitly choose to install or load a font.
Navigating to a Folder
Use the folder tree on the left side of the Browse tab to navigate to the location that contains your fonts. Click any folder to select it — X-Fonter immediately begins scanning that folder for font files. The results appear in the list on the right as they are found, so you do not have to wait for the scan to finish before you start previewing.
All drives visible in Windows Explorer are available here, including mapped network drives and removable media. If you insert a disc or plug in a USB drive after X-Fonter is already open, click the Refresh button to update the drive list.
Toolbar Buttons
| Button | What it does |
|---|---|
| Favorites | Opens a menu of your saved folders so you can jump to a frequently used location in one click. The same menu lets you add the current folder to your favorites or open the Favorite Folders manager to rename or reorganise them. |
| Include Subfolders | When enabled, X-Fonter searches the selected folder and all folders inside it recursively. Use this to scan an entire drive or a deeply nested font library in a single pass. The button highlights when the option is active. |
| Refresh | Re-reads the current folder. Use this after adding or deleting font files outside of X-Fonter, or after connecting new removable media, to make sure the list is up to date. |
| Cancel Search | Stops a scan that is in progress. Useful when searching a large folder tree and you have already found what you need — the fonts discovered so far remain in the list. |
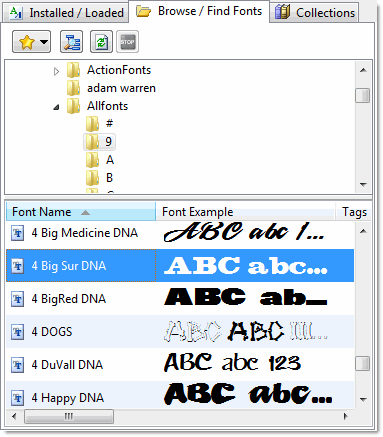
The Font Results List
Each row in the results list represents one font file and shows:
- Font name — the internal name stored in the font file (not necessarily the filename)
- File name — the actual file on disk
- Type — TrueType, OpenType, or PostScript Type 1
- File size
- Folder path — particularly useful when searching with subfolders enabled
Click a font in the list to select it. The Font Detail panel at the bottom of the screen updates immediately to show a preview of the selected font at various sizes, along with its full character set and metadata.
Double-clicking a font opens it in the Font View window, where you can type your own sample text and compare it side-by-side with other fonts.
Loading a Font Temporarily
If you want to try a font in another application without permanently installing it, use Load. A loaded font becomes available to all running Windows applications for the current session only — it is unloaded automatically when X-Fonter closes or when you unload it manually.
To load one or more fonts from the Browse tab:
- Select the font(s) in the results list.
- Right-click and choose Load Font(s), or click the Load button in the toolbar.
- Switch to your design application — the font will appear in its font menu.
See Installing & Loading Fonts for full details, including how to load an entire folder at once.
Using Favorites for Quick Access
If you regularly browse the same folders — for example, a project folder, a client archive, or a font library on a network share — add them to your Favorites so you do not have to navigate the folder tree each time.
- Navigate to the folder in the folder tree.
- Click the Favorites button.
- Choose Add Current Folder to Favorites.
From then on, that folder appears at the top of the Favorites menu. See Favorite Folders for more on organising and renaming your favorites.
Common Scenarios
Scanning an entire hard drive for fonts
Select the drive root (for example C:\) in the folder tree, enable
Include Subfolders, then wait for the scan to complete. Results will include
every TrueType, OpenType and PostScript font on the drive. On a drive with thousands
of fonts this can take a minute or two — use Cancel Search as soon as you have
found what you need.
Browsing a font CD or USB drive
Insert the disc or plug in the drive. Click Refresh to make it appear in the folder tree, then navigate to it as you would any local folder. You can preview and load fonts directly from the removable media without copying them to your hard drive first.
Finding fonts in a deeply nested project folder
Navigate to the top-level project folder, enable Include Subfolders, and let X-Fonter scan the entire tree. Every font file found — regardless of how many levels deep — will appear in the flat results list, making it easy to compare them all at once.
Related Topics
- Installed & Loaded Fonts — manage the fonts already active on your system
- Installing & Loading Fonts — make a browsed font available to other applications
- Collections — group browsed fonts into named sets without moving the files
- Favorite Folders — save frequently used browse locations for one-click access
- Font Filtering — filter large result lists by type, name, or other criteria
Copyright © 2001-2026 Blacksun Software. All Rights Reserved