X-Fonter 14.0
ASCII Character Map
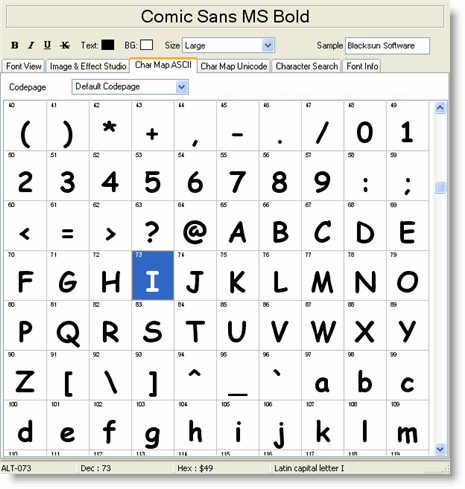
The ASCII Character Map is the third tab of the Font Detail Panel. It displays all 256 ASCII/ANSI characters rendered in the currently selected font, arranged in a grid so you can see at a glance how the font handles every printable symbol — from basic letters and digits through accented characters, currency signs, mathematical symbols and box-drawing characters.
Because not every font covers every character, the map also makes it immediately obvious when a character is missing: the cell will show a fallback glyph or remain blank. This is the fastest way to confirm whether a font includes a specific character before committing to it.
Reading the Grid
Each cell in the grid shows one character rendered in the selected font at the current preview size. When the font size is set to 20 or higher, the character's decimal code number is also shown in the upper-left corner of each cell, making it easy to locate a specific character by its code point without counting through the grid manually.
The grid automatically adjusts the number of columns to fit the available width, so you never need to scroll horizontally — only vertically if the cells are large. Reducing the font size fits more characters on screen at once; increasing it makes individual glyphs easier to inspect.
€, decimal 128 / hex 0x80), the trademark symbol
(™, decimal 153), or any other extended character by scanning the
upper half of the grid (codes 128–255). Blank or box-shaped cells in that range
indicate characters the font does not support.
The Statusbar
Clicking any character cell selects it and updates the statusbar at the bottom of the screen with four pieces of information about that character:
| Field | Description |
|---|---|
| Keyboard shortcut | The key combination you can use to type this character directly in Windows applications — typically Alt + a numeric keypad number. For example, Alt+0169 produces the copyright symbol ©. Use this to type special characters without copying from the map every time. |
| Decimal value | The character's code point in base 10 (for example, 169 for ©).
This is the number used with the Alt+numpad shortcut. |
| Hexadecimal value | The same code point expressed in base 16 (for example, 0xA9 for
©). Useful when working with HTML character references or CSS
\00A9 escape sequences. |
| Character name | The official name of the character (for example, COPYRIGHT SIGN). This is the same name used in the Character Search tab, so if you spot a character here and want to find it in other fonts, you can search by this name directly. |
Copying Characters to the Clipboard
To insert a special character into a document without using the keyboard shortcut, double-click its cell in the grid. The character is added to the Sample edit box above the map. You can double-click multiple characters in sequence to build up a string of symbols in the Sample box.
Once your characters are in the Sample box:
- Select the text in the Sample box (click and drag, or Ctrl+A).
- Right-click and choose Copy, or press Ctrl+C.
- Switch to your document and paste with Ctrl+V.
Changing the Codepage
The upper 128 characters (codes 128–255) of the ASCII/ANSI range are not fixed — their meaning depends on the active codepage, which determines which language or character set those slots represent. For example, codepage 1252 (Western European) places the Euro sign at position 128, while codepage 1251 (Cyrillic) places a Cyrillic capital Dje there instead.
Changing the codepage selector updates the map instantly, showing which characters occupy each position under that encoding. This makes it easy to verify that a font correctly supports the extended characters for a specific language before using it in a multilingual document.
Adjusting the Display Size
The preview size is controlled by the size setting in the Control Panel at the top of the Font Detail Panel and applies across all detail tabs simultaneously. In the character map specifically:
- At smaller sizes (below 20 pt) the grid shows more characters per screen and the code-number overlay is hidden to avoid clutter — useful for a quick full-grid scan.
- At larger sizes (20 pt and above) each cell is bigger, the code number appears in the corner, and fine details of the glyph design become visible — useful for inspecting specific characters closely.
The column count adjusts automatically at every size so the grid always fills the available width without horizontal scrolling.
Related Topics
- Unicode Character Map — browse the full Unicode range, organised by script block, for fonts with extended coverage
- Character Search — find a character by name or code point across both ASCII and Unicode
- Image & Effect Studio — render characters from the Sample box with effects applied
- Character Encoding — background on ASCII, ANSI codepages and Unicode and how they relate to each other
- Font Detail Panel — overview of all six detail tabs and the shared Control Panel
Copyright © 2001-2026 Blacksun Software. All Rights Reserved